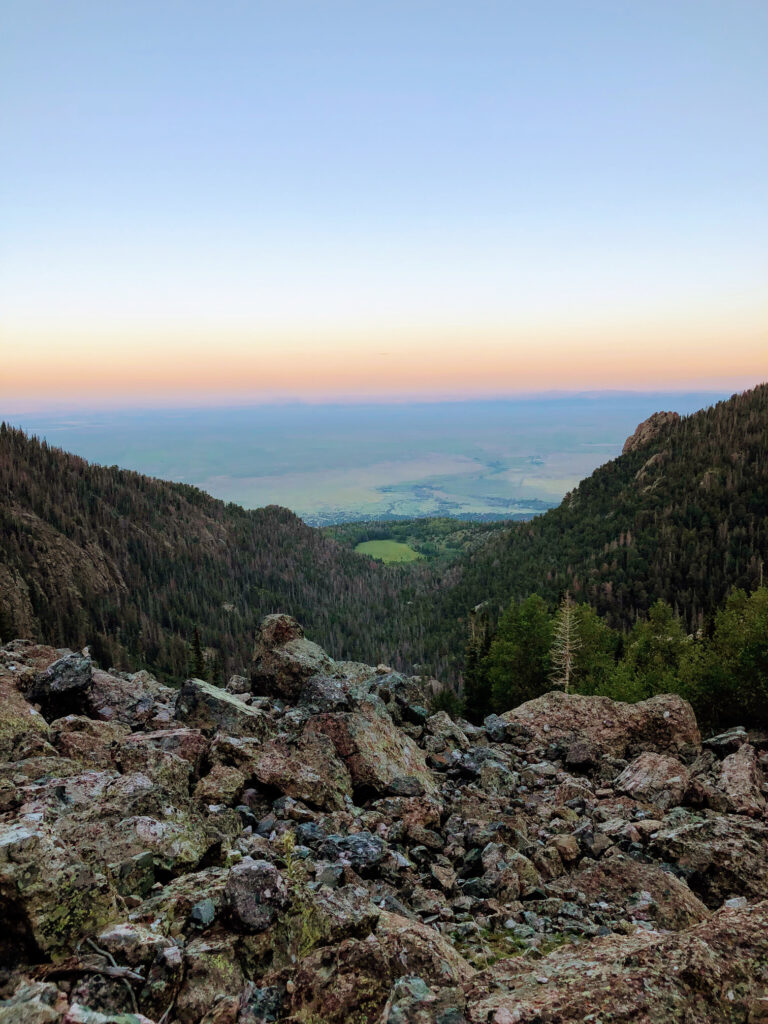
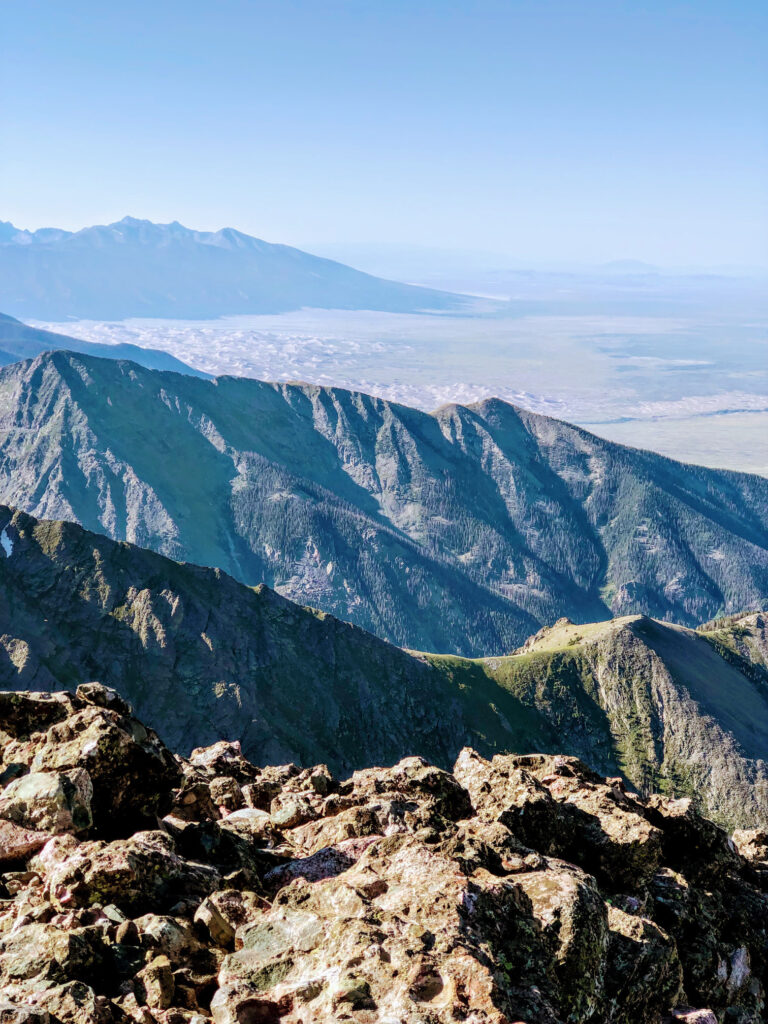
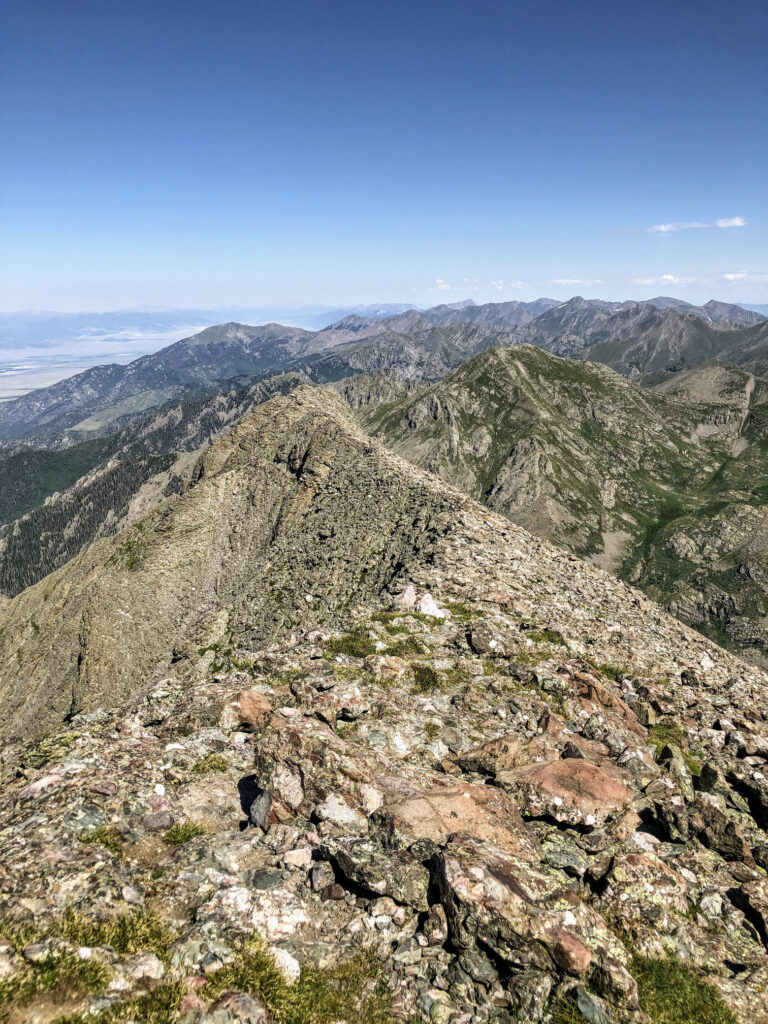
Challenger Point (14,087ft., 34th tallest in CO) and Kit Carson Peak (14,171ft., 23rd tallest in CO) are two 14er mountains situated next to one another in the Sangre de Cristo Range of southern Colorado. Technically speaking, Challenger Point is a sub-peak of Kit Carson Peak, but each mountain holds its own distinction as a Colorado 14er. Further, regardless of whether you hike one or both mountains during your outing, you’ll be treated to absolutely stunning views of the San Luis Valley, including a birds eye view of the extraordinary Great Sand Dunes.
Since the Sangre de Cristo area is far removed from the busy Denver metro, hikes here are much less crowded than popular Front Range 14er hikes where parking can be problematic. In fact, most hikers of Challenger Point and Kit Carson are rewarded with a bit more solitude and opt to bag both peaks in one very long day hike or overnight in the backcountry near Willow Lake to make it a two-day hike. The most common approach to summit both mountains is via the Willow Creek and South Crestone Trailhead, taking the Class 2 North Slope approach up Challenger Point, hiking the saddle between Challenger Point and Kit Carson Peak, then summitting Kit Carson Peak’s West Ridge via “The Avenue.” This combined, two-peak route is rated as an Easy Class 3 and is about 14.5 miles in length.
HIKE REVIEW SERIES: Challenger Point and Kit carson Peak
Mountain Information
Challenger Point, which is the first 14er mountain you’ll reach on this route, is named after the Space Shuttle Challenger disaster that occurred in 1986. Although Challenger Point is a sub-peak of Kit Carson Peak, the mountain does hold its own distinction within the famed Colorado 14er mountain group. The second 14er mountain you’ll reach is Kit Carson Peak, named after Christopher Houston “Kit” Carson, the famous, but controversial, 19th century frontiersman.

Challenger Point
- Summit Elevation: 14,087ft.
- Range: Rocky Mountains
- Sub-Range: Sangre de Cristo Mountains
- Location: Rio Grande National Forest
- Nearest Town: Crestone, CO
Kit Carson Peak
- Summit Elevation: 14,171ft.
- Range: Rocky Mountains
- Sub-Range: Sangre de Cristo Mountains
- Location: Rio Grande National Forest
- Nearest Town: Crestone, CO

Trail Guide
Route Information
- Route: Kit Carson (West Ridge) via Challenger (North Slope)
- Class: Easy Class 3
- Type: Out and Back
- Trailhead: Willow Creek & South Crestone Trailhead
- Trailhead Elevation: 8,850ft.
- Route Length: 14.5 miles
- Elevation Gain: 6,300ft.
Route Overview
We recommend an early, alpine start for a day hike of Kit Carson Peak via Challenger Point, though those dynamics would change if you plan to camp along the way. If you are hiking at a fairly fast pace, the full hike will take somewhere in the range of 8-10 hours. Alternatively, a more moderate pace will keep you outdoors most of the day, so do keep that in mind.
In terms of wildlife, you may be lucky enough to see some big horn sheep along the hike route. In addition, you’re likely to spot some of the Trinchera elk herd and other alpine critters like yellow-bellied marmots and pikas. Also, if you’re interested in wildflowers, pick up a naturalist guidebook such as Plants of the Rocky Mountains to assist with plant identification.
Route Steps
- Step 1 - Begin at the Willow Creek and South Crestone Trailhead. Please remember to register at the trailhead, for safety and wilderness management purposes.
- Step 2 - Quickly bear right on the Willow Lake Trail. This turn is easy to miss if you’re not paying attention, especially during an alpine start in the dark hours of the morning.
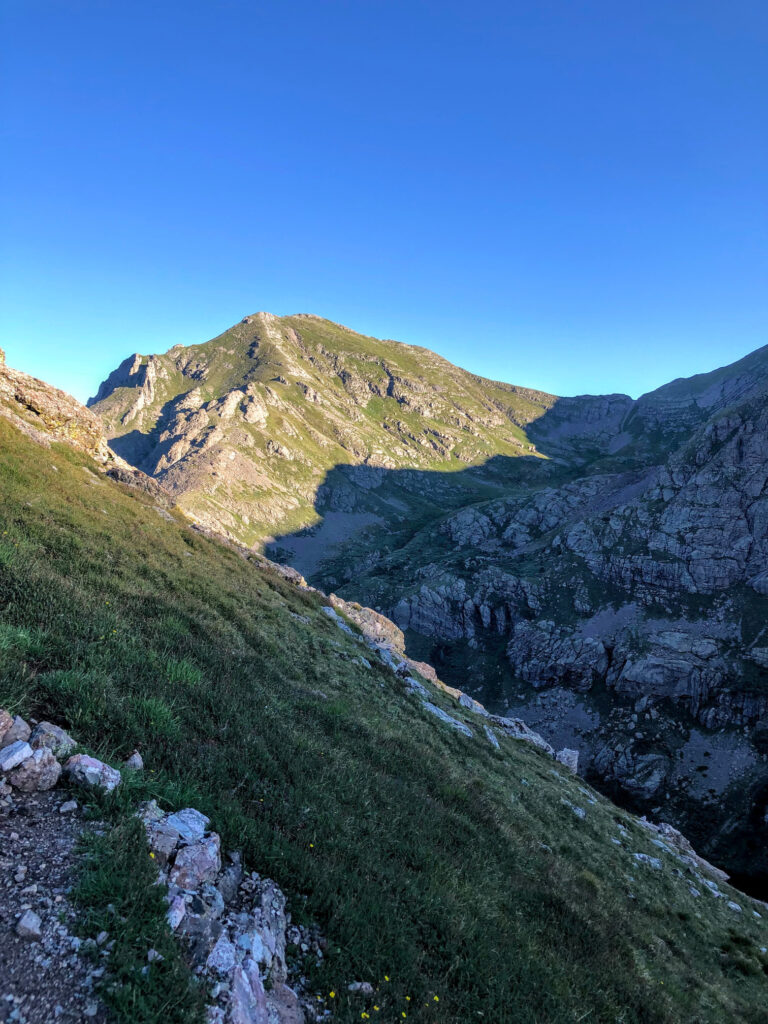
- Step 3 - Follow the Willow Lake Trail through a long series of switchbacks, ascending nearly 3,000ft. and 4.5 miles along the way up to Willow Lake. Enjoy the views along the initial ascent.
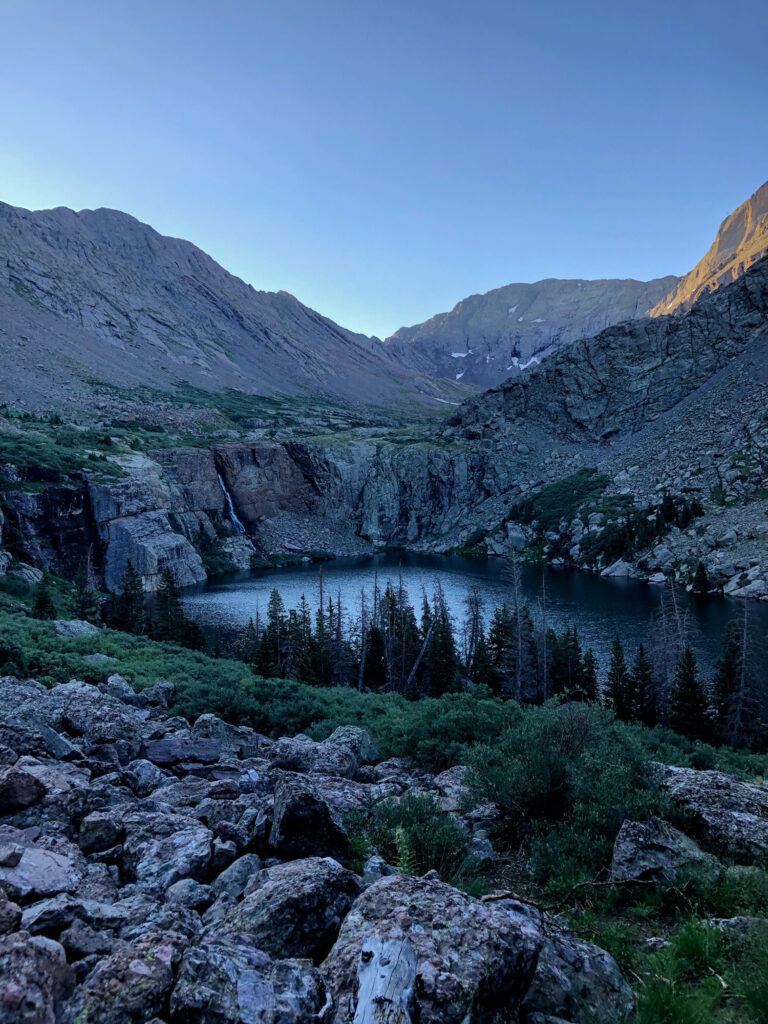
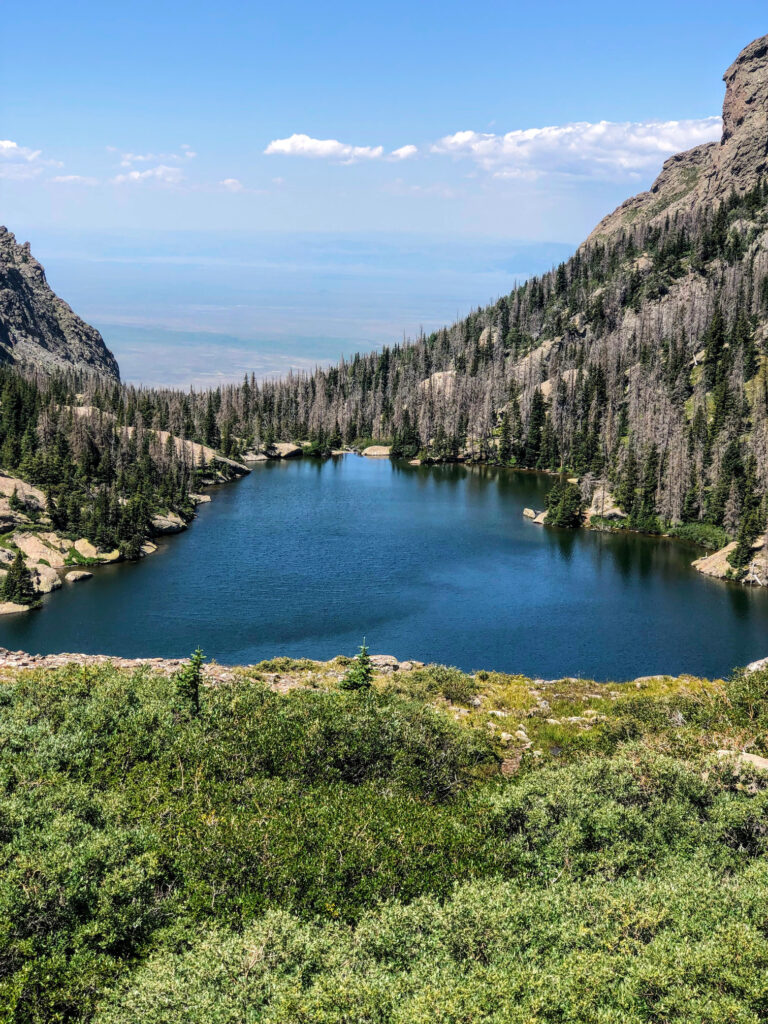
- Step 4 - Reach Willow Lake (elevation 11,700ft.). As a day hike, this is a good resting spot with nice scenery (Willow Lake is filled via a 100ft. waterfall) and an opportunity to resupply water, eat lunch, etc. Alternatively, if you decide to camp, there are a number of campsites nearby. Willow Lake has frequent wildlife visitors, especially due to the abundance of campers. So if you do camp here, make sure to properly secure food, etc. per wilderness regulations.
- Step 5 - Follow the trail around the lake to the top of the Willow Lake waterfall towards the North Slope approach of Challenger Point. Make sure you are rested at this point, as you’ll begin to quickly gain significant elevation.
- Step 6 - Take the North Slope approach towards the Challenger Point summit. This Class 2 approach is a very long, steep, and loose ascent and arguably the most difficult portion of the hike. During our hike, the Rocky Mountain Field Institute (RMFI) was doing trail maintenance and improvements. Big thanks to their organization!
- Step 7 - Ascend and summit Challenger Point. Hike through the notch and continue along the ridge to the Challenger Point summit at an elevation of 14,081ft. Don’t miss the plaque on the Challenger Point summit, which serves as a memorial to the 1986 Space Shuttle Challenger disaster.
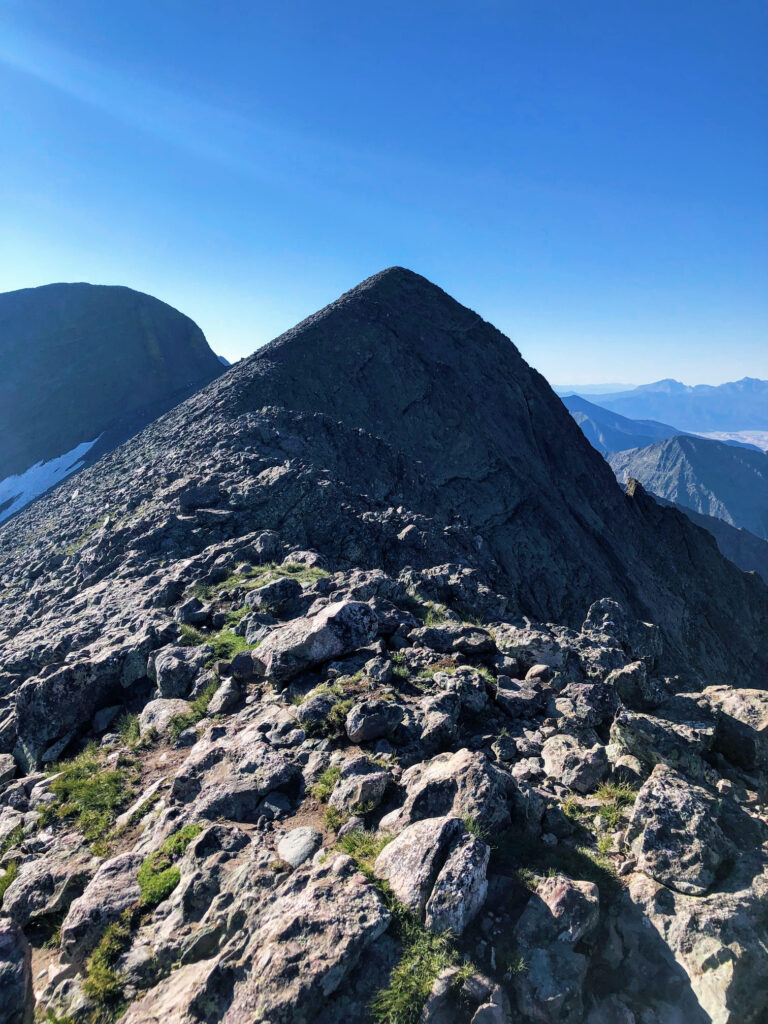
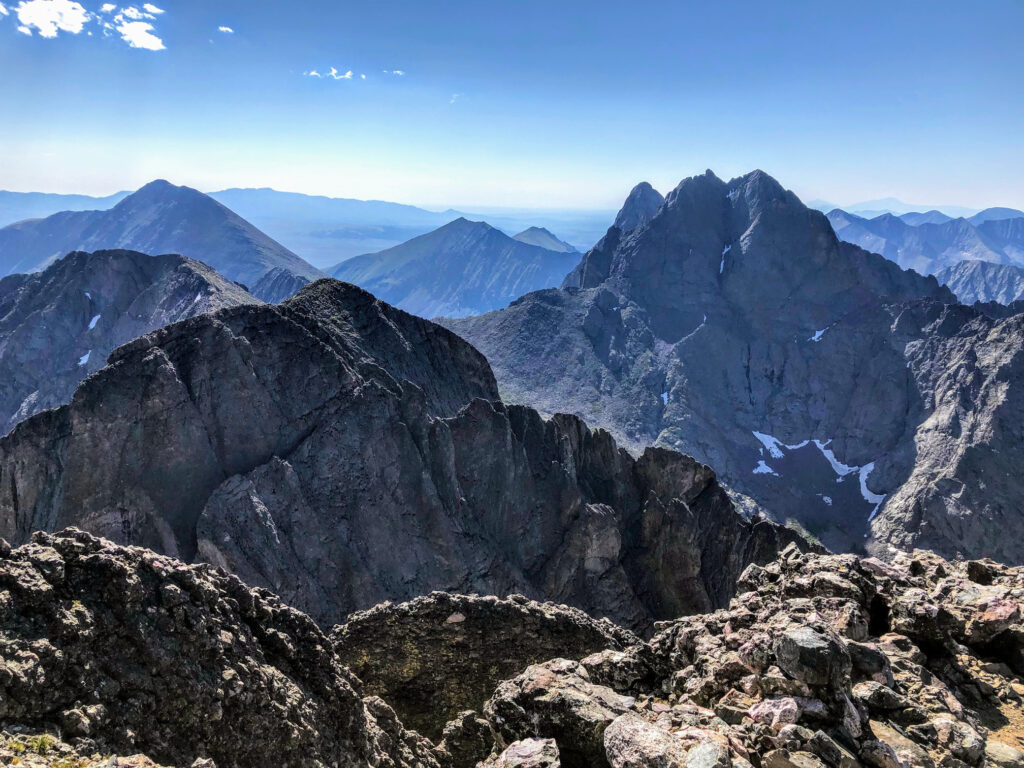
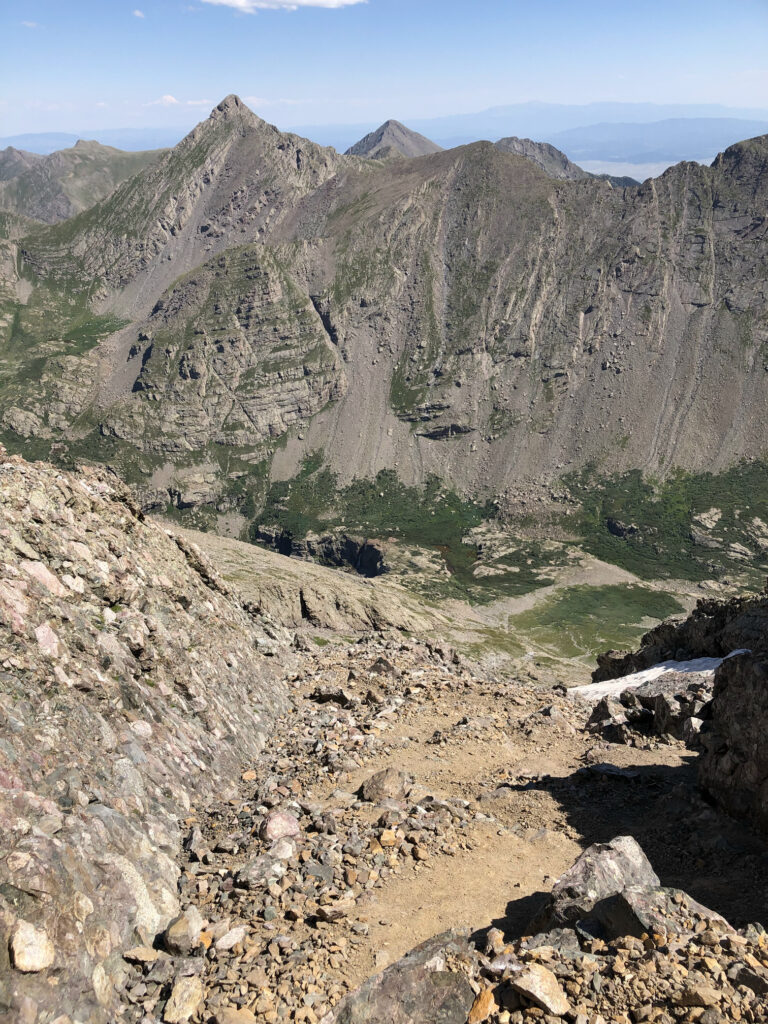
- Step 8 - Follow the saddle ridge between Challenger Point towards Kit Carson Peak. Along the way, you’ll have views of the Great Sand Dunes peeking out behind the mountains ahead. Trail cairns are not always readily visible along the descent, but enough are there to stay on track.
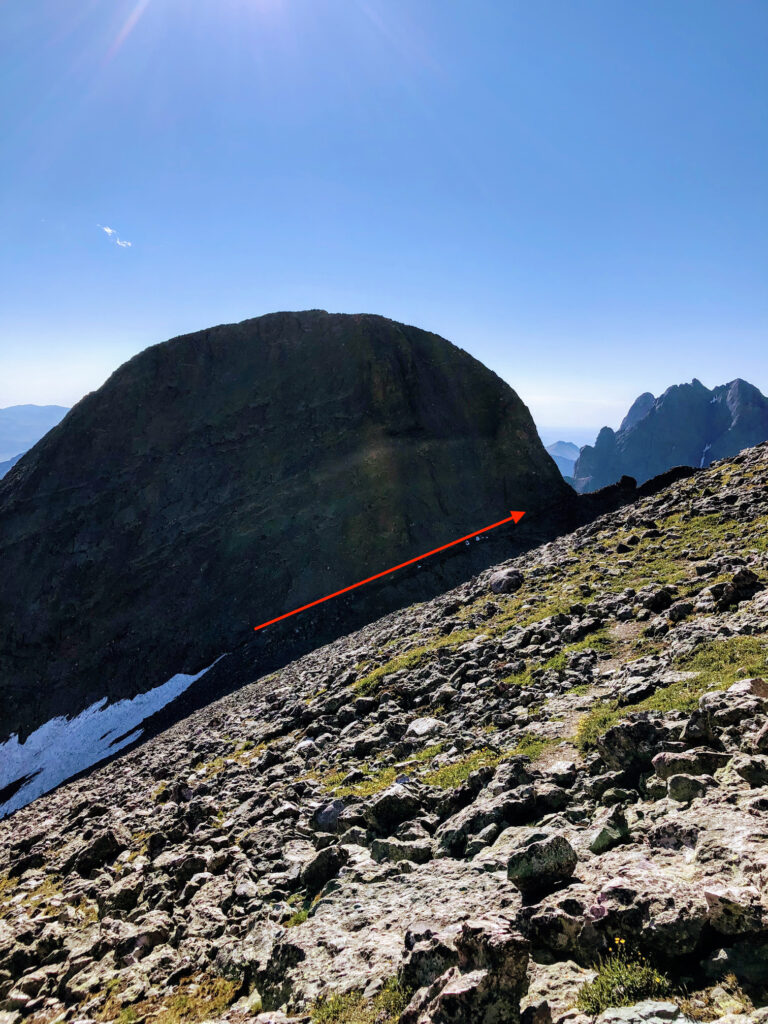
- Step 9 - As you start up Kit Carson Peak, you’ll notice a very interesting feature nicknamed the “The Avenue.” This is a narrow and upwardly sloped ledge on the north side of Kit Carson Peak and is your Class 2 route. Ascend up the “The Avenue,” and you’ll eventually descend a bit and regain elevation as you hike up a gully towards the summit.
- Step 10 - Ascend and summit Kit Carson Peak. After a Class 3 scramble to the Kit Carson Peak summit at 14,171ft., you’re rewarded with amazing views of other prominent peaks in the area. Among them, Humboldt Peak, Crestone Peak, Crestone Needle, Columbia Point, and of course Challenger Point.
- Step 11 - Double-back off of Kit Carson Peak, descending and re-ascending portions of “The Avenue,” back towards Challenger Point.
- Step 12 - Re-ascend Challenger Point. Again, trail cairns can easily be missed here, so keep a watchful eye to stay on route. Hike the ridge to the summit and get ready for a steep descent.
- Step 13 - Descend Challenger Point via the route you ascended. This descent features extremely loose rock, so exercise caution. Hiking poles will come in handy here to increase stability and make it easier on your knees. Scree and talus can be easily dislodged, so be aware of other ascending hikers.
- Step 14 - Continue back the way you came, towards Willow Lake. The steepness of the trail eventually mellows out a bit as you descend. Once at Willow Lake, this is another great opportunity to rest after a steep descent.
- Step 15 - Continue following the Willow Lake Trail towards the trailhead where you started, descending in elevation via the switchbacks along the way.
- Step 16 - Arrive back at the Willow Creek and South Crestone Trailhead. Now you can bask in the glory of hiking two phenomenal Colorado 14ers and approximately 14.5 miles round-trip. Congratulations!
Planning Tips
Getting There
In the town of Crestone, CO, take E. Galena Ave. towards the Willow Creek and South Crestone Trailhead. E. Galena Ave. is a paved road in town, but quickly turns into an unimproved and rough dirt road. We recommend taking a high clearance vehicle, preferably a 4×4. Inevitably, you’ll see 2WD low clearance vehicles attempt the drive up the dirt road, but we strongly advise against it because of the potential damage and risk of getting stuck.
Parking
Limited parking is available at the Willow Creek and South Crestone Trailhead. While there are enough spaces for about 20-25 car, spots tend to fill up quickly. So, plan to arrive early or secure a nearby campsite the night before to prepare for an alpine start.
Camping
If you plan to hike Challenger Point and Kit Carson Peak via a day’s long hike, consider car camping near the trailhead to facilitate an early morning start. There are a few free camping spots along the road leading up to the Willow Creek and South Crestone Trailhead, and there is a pit toilet in the parking lot. Because this is a 14er hike, you should plan to get there early before any camping spots are taken, especially on the weekends.
Alternatively, if you decide to split this hike into two-days and overnight in the backcountry, we suggest hiking up to Willow Lake for an ideal campsite. After camping overnight, plan to leave your heavy gear at the campsite, bag both Challenger Point and Kit Carson Peak, return to pick up your gear, and then head back to the trailhead.
Pets
Dogs are permitted on leash, but we do not recommend bringing them along for this particular hike. In fact, we’ve seen some pets have difficulty on this hike due to ruggedness of the terrain and overall distance. For that reason, we advise against hiking with pets on this one.
Weather Forecast
Always check the weather forecast before venturing into alpine country. During the summer time in Colorado, thunderstorms and lighting frequently occur at high elevation and you should proceed with caution. If the weather is not ideal, plan your summit adventure for another day. Safety first! Note that these peaks are adjacent to one another, so the weather forecasts will nearly be identical.
RECOMMENDED HIKING APPAREL AND GEAR
Ten Essentials
When hiking in Colorado, you should always be prepared for sudden changes in weather, especially on 14er hikes. Therefore, you should carry the appropriate type and amount of gear, clothing, food, water, and other essentials. For certain, make sure that your packing list includes the Ten Essentials. It’s best to always be prepared!
Hiking Boots
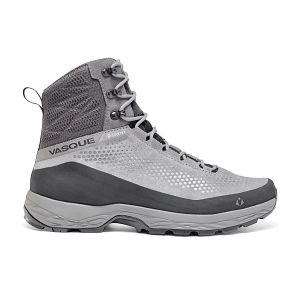
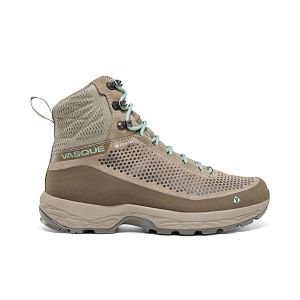
The Vasque Torre hiking boots are incredibly lightweight, provide excellent traction, and are quite affordable for their versatility. We like the Vasque Torre’s for everyday hiking that includes a bit of scrambling. In addition, with the “GORE-TEX” construction, you don’t have to worry about damp feet if the weather turns or you have to splash through streams or puddles along the way.
Hiking Pants
We love prAna’s hiking pants for their quality and versatility. Indeed, their Zion (for men) and Halle (for women) are great on- and off-trail, especially for travel. Constructed with a durable UPF-50 fabric, a water-repellant finish, and utility pockets, these have become a staple in our wardrobe. Remember that it can be rather chilly at alpine elevations, so consider hiking pants rather than shorts (both for warmth and sun protection).


Hiking Shirt
It can get chilly during alpine outings, particularly when you start early in the morning. Therefore, we typically opt for a long sleeve but lightweight shirt to keep us warm when it’s cold, but keeps us cool when we are working up a sweat later in the day. The no-cotton rule applies to shirts just as it does for pants and other articles of clothing.
Our preferred hiking shirt in the summer is Outdoor Research’s Echo Hoody because of its UPF sun protection qualities and lightweight (4oz.) breathable construction. The shirt has a hood for added neck protection and has thumbholes to protect your hands from sun exposure, if you opt to not wear sun gloves. Outdoor Research also makes different varieties of the Echo shirt (e.g., quarter zip, long sleeve without hood, t-shirt, etc.) if you prefer another style.


Insulated Jacket
The Arc’teryx Atom is easily our favorite insulated jacket. Yes, there may be lighter weight alternatives on the market, but we love the style, fit, packability, and function. Wear the Atom during early morning starts or when you reach the mountain summit. It’s a great addition to an outdoors wardrobe and comes in handy when the temperature dips.


Hiking Socks
For most of our hiking needs, we like Darn Tough socks over the multitude of options on the market. They last long and have an ironclad guarantee. In addition, Darn Tough has a variety of designs, ankle lengths, and cushioning options to choose from. We like the Hiker quarter length with light cushioning.


Headwear/Face Covering
We often wear a Buff as a neck gaiter to protect from the sun, given its UPF 50 protective construction. Buffs are also a great option to use as a face covering on the trail. In fact, there are 12+ ways of wearing a Buff, so it’s a versatile piece of gear.

Day Pack
To summit Challenger Point and Kit Carson Peak, we like REI Co-op’s Flash 22L pack for its affordability, lightweight design, and overall versatility. This pack has enough storage for a day hike and side pockets are available to store Nalgene bottles or other equipment. It is also hydration reservoir compatible. We think the 22L version has the perfect capacity, though REI does have an even smaller Flash 18L with a drawcord top.

Trekking Poles
Although trekking poles are optional and a matter of preference, we prefer to use them for added stability. We recommend choosing the lightest weight poles your budget can afford. The Black Diamond Distance Z is our top choice due to its extremely lightweight construction. If you are seeking just one pole, rather than two, consider Gossamer Gear’s LT5, which can be purchased individually.

Helmet
There are plenty of good, versatile helmets in the market place, but we favor Petzl’s helmets for mixed use – mountaineering, climbing, etc. Plus, Petzl is known for making high quality climbing equipment and is a brand we trust with such a vital piece of safety gear. The Petzl Sirocco is our go-to option for its comfort and design, but Petzl has a wide array of quality helmets at various price points.

recommended books
In our opinion, the best guidebook for information on Colorado’s 14er mountains is Gerry Roach’s Colorado’s Fourteeners: From Hikes to Climbs. All other guidebooks pale in comparison. Thus, this book will suit you well for hiking Challenger Point and Kit Carson Peak. Although Roach’s book is incredibly detailed, you’ll still want to carry a topographical map such as National Geographic Trails Illustrated Map for the Sangre de Cristo Mountains. In addition, we included a couple of our favorite field guides for plant and bird identification. These guides provide useful information that we find add to the outdoors experience and obviously help answer questions about animal and flower species.
- Colorado’s Fourteeners: From Hikes to Climbs
- Sangre de Cristo Mountains – National Geographic Trails Illustrated Map
- Plants of the Rocky Mountains
- Sibley Birds West: Field Guide to Birds of Western North America
Disclosure: Please note that this post contains affiliate links. We may receive a small commission if you buy a product or service through an affiliate link. This revenue helps us provide readers with helpful content to plan amazing adventures.